Designing & Coding Google's Creative 5 Application
Now that I’m a techno crab, what should I do? I have a lot of tools at my disposal that allow me to hack these shapes, which are all flat, sitting on a flat canvas.
So what if I unflatten them by adding depth? I could build interesting structures with these shapes. Maybe even an illusion. I could then use each frame to assemble this structure. It will probably look a bit boring bringing in piece by piece, since the animation is more of a transition between frames, but let’s see what I can make of it.
So what better 3D illusion than those from the one and only M.C. Escher? The “Waterfall” in particular has many components, which could look interesting when assembling. But how the hell am I going to draw this on that canvas? I need to precisely edit the shapes point by point so I can properly fit everything together. Maybe there’s a way to do that through the console…
GShapes are my new best friends
It turns out that there is a way to programmatically edit the shapes point by point. After a little bit of digging, you’ll see it. Just click on a shape to get its name (the blue circle, for example), then type that name on the console. You should get a GShape object like so:
>Lola
GShape {path: O.e…d.initialize, id: 29, smooth: false, isLine: false, segments: Array[8]…}
This object has a ton of properties, but I’m interested in only one for now: its points. One of the properties is the array keyframes, meaning each array element should store info such as position for each keyframe. Since we have only 1 keyframe for now, we have only one array element. Inside this element, we have a state object, which also contains an array called… point:

An array with 8 elements means 8 points, which is exactly the number of points of the blue circle. Nice. So that means that changing the x and y values of each point should allow me the precision I need. Besides, it’ll be much easier to bulk-edit a bunch of points with a few lines of javascript.
So now that I know that it’s possible to edit the shapes through the console, what’s the best way to design what I want on that canvas?
Enters Adobe Illustrator
If there’s one thing I love about the internet is the ability to share your work with others. That’s exactly what Mike Swanson did on his blog: he gave us the AI > Canvas PlugIn for Illustrator. What it does is pretty interesting: it exports an html code based on your AI file, drawing each layer as a separate canvas path.
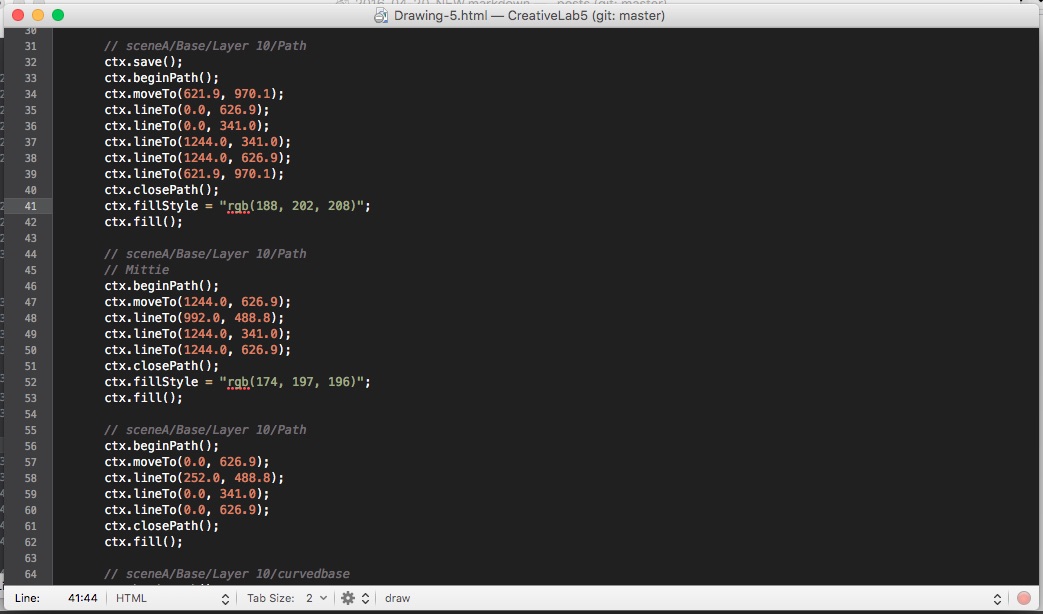
It basically creates one variable called ctx and then uses it to draw different shapes across the canvas, splitting them by layer groups and name. I’m interested in two things here:
- the points coordinates, which are the
ctx.lineTocommands (notice that the lastctx.lineTois always the same as the initialctx.moveTo, meaning it’s going back in order toctx.closePath()); - the color, taken from the
ctx.fillStylecommand (notice that some do not have that, meaning it’s using whatever color was defined for the previous drawn shape).
Now I just need to easily translate that into javascript commands, which should take the following form:
{name-of-shape}.keyframes{index}.state.point{point-number}.{x-or-y} = {coordinate-value}, where:
- name-of-shape: given by clicking on a shape;
- index: the keyframe we want to work on;
- point-number: should be a number between 0 and the number of points - 1;
- x-or-y: whatever axis you want;
- coordinate-value: the golden egg, given by the AI to Canvas export.
I opted for a simple spreadsheet to parse the string from the export and concat the data into js commands:
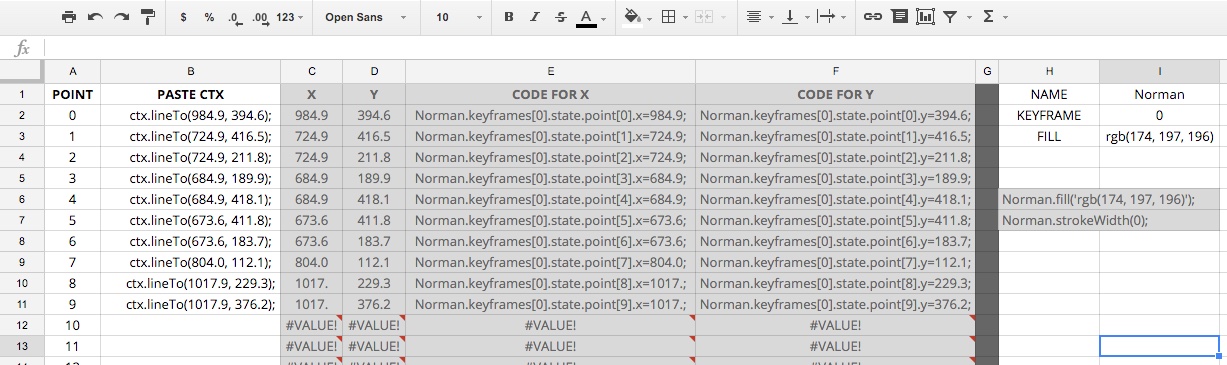
Just pasting the ctx.lineTo commands on col B and then writing the name of the shape, the keyframe and the fill rgb code on col I, will then spit out the result on the gray cells. Copy that and paste it on the terminal and you’ll have a perfect shape on the perfect spot that you want.
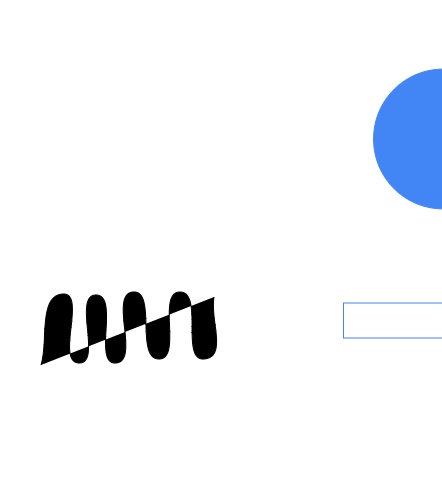
But there’s a catch: the shape needs to have the correct number of points beforehand. On the example, I need a shape with 10 points, but I have a maximum of 8 on the circles. So I’ll have to use the activatePen(104743) command. It allows me to create a shape with however many points I want. But there’s another catch: new shapes have rounded corners by default. This is what I get when I draw a simple zig-zag shape:
So how do I remove the rounded corners? A quick look at the shape’s state object gives me handleIn and handleOut arrays, which are nothing more than the corners’ handles. So all I need to do is zero out those values:
/* REMOVE ANGLE HANDLES FROM SHAPE */
var elmt = Rena.keyframes[0].state;
	for (i = 0; i < elmt.handleIn.length; i++) {
	    elmt.handleIn[i].x = 0;
			elmt.handleIn[i].y = 0;
	};
	for (i = 0; i < elmt.handleOut.length; i++) {
	    elmt.handleOut[i].x = 0;
			elmt.handleOut[i].y = 0;
	};
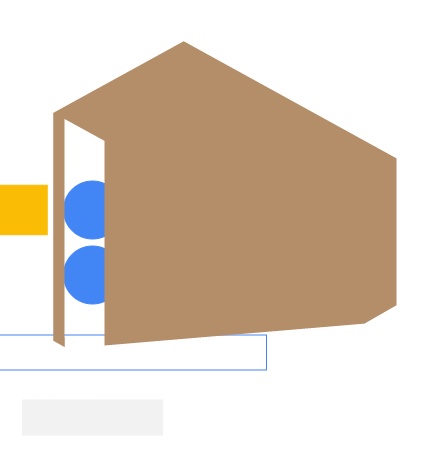
Now I just run the code from the spreadsheet and that results in the shape and position I want:
Script-editing the whole thing
Now that a POC has been established, we can start expanding to the other shapes and slowly our drawing begins to appear. I ended up coding a couple of other js scripts so I could manipulate the shapes faster. For instance, I needed to move a whole shape by a certain amount of pixels over an axis. Moving with the mouse would result in a loss of precision, and I didn’t want to count how many keyboard arrow hits I was using for each shape. So, in order to easily move one shape by a number of pixels:
/* TRANSLATE ALL ELEMENTS OVER AN AXIS BY N PIXLES ON k KEYFRAME */
	var N = 100;
	k = 1;
	for (i = 0; i < Jacob.keyframes[k].state.point.length; i++) {
		Jacob.keyframes[k].state.point[i].y += N;
	};
Things started to grow, so it made sense to create shape groups. Something like var structure-base = [Marc, Willie, Francis, Lilly, Christian, Scott];, which then allowed for:
/* TRANSLATE ALL ELEMENTS FROM A GROUP OVER AN AXIS BY N PIXLES ON k KEYFRAME */
	var N = 100;
	var group = structure-base;
	var k = 0;
	for (j = 0; j < group.length; j++) {
		for (i = 0; i < group[j].keyframes[k].state.point.length; i++) {
			group[j].keyframes[k].state.point[i].x += N;
		}
	};
La Pièce de Résistance Porteur
I still needed some final touch, but what? I wanted to end in something other than only showing the final structure. But what, exactly?
Inspiration came from where it (almost) always comes from: the bathroom’s Iron Throne:

ustwo’s beautiful masterpiece Monument Valley is all about perspectives and illusions. And, apparently, levels with a number as part of the structure. I edited the pieces’ scales in order to fit with what I had and recolored them using Google’s colors.
Piece by piece, I assembled my animation, until I finally had something to show for:

Wrapping up
At this point, I was feeling tired by the whole journey. Working on this for a couple of days until I finally landed on a scalable method was enough for me. Upping the ante in order to create new challenges and restart the fun would require a lot more work, so I felt like that wasn’t worth it and considered my challenge as complete. Yes, the design was still a bit crude, but it was enough for an MVP (the product term, not the sports one), specially because I had no idea how long the application would remain open for, so I had to push something out the door ASAP.
I gotta say: I had loads of fun while cracking the techno crab challenge, but the design and animation proved to be a challenge in itself, demanding more thinking on how to do it in a proper/easy way. Overall, it was fun, challenging and exciting, all at the same time. You know, everything a job application never is, so big thanks for the CL5 team for making this happen. You really made a couple of my days.